
Blog
How to Convert a PNG to a 3D STL Model
Learn how to convert a PNG into an STL 3D model using heightmaps, contour extrusion, online tools, or Blender for 3D printing and relief modeling.
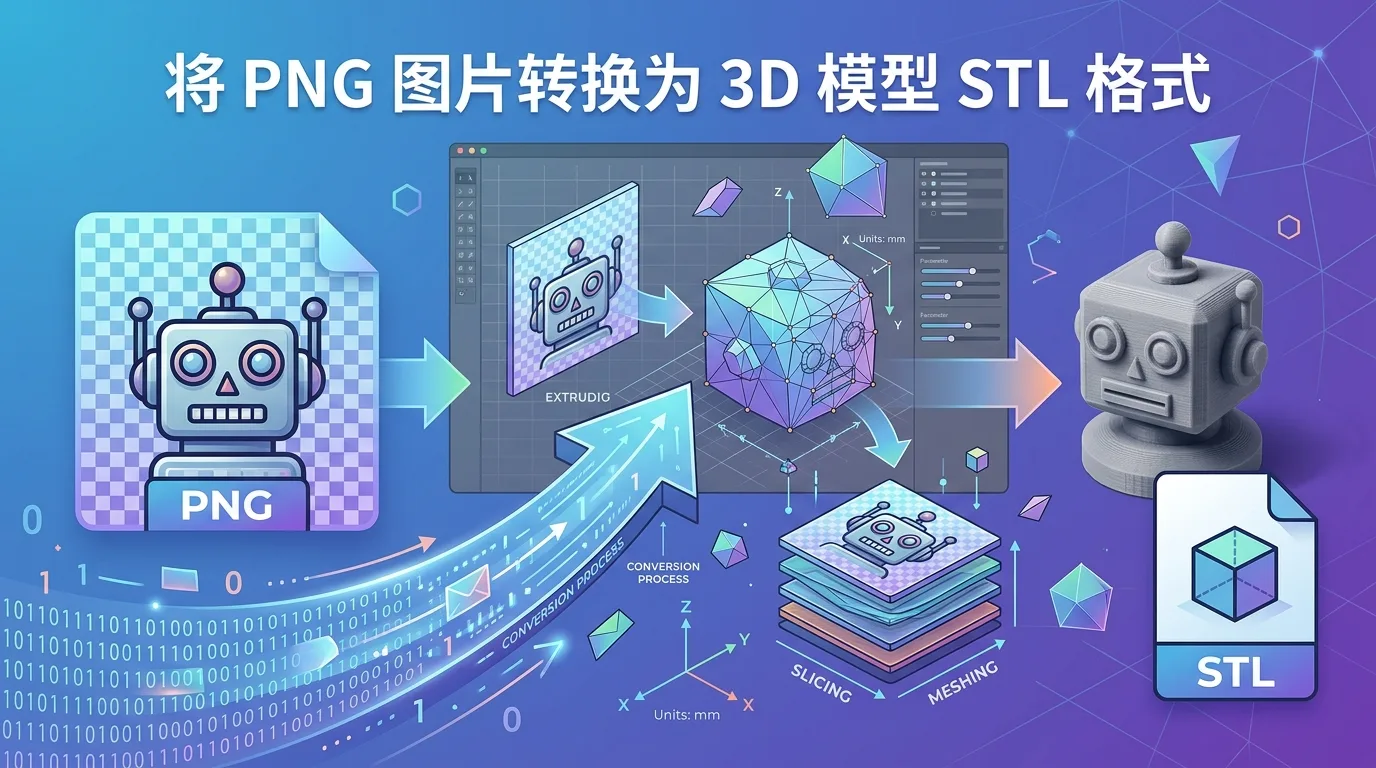
How to Convert a PNG into a 3D STL Model
1. Basic Principles of Converting PNG to STL
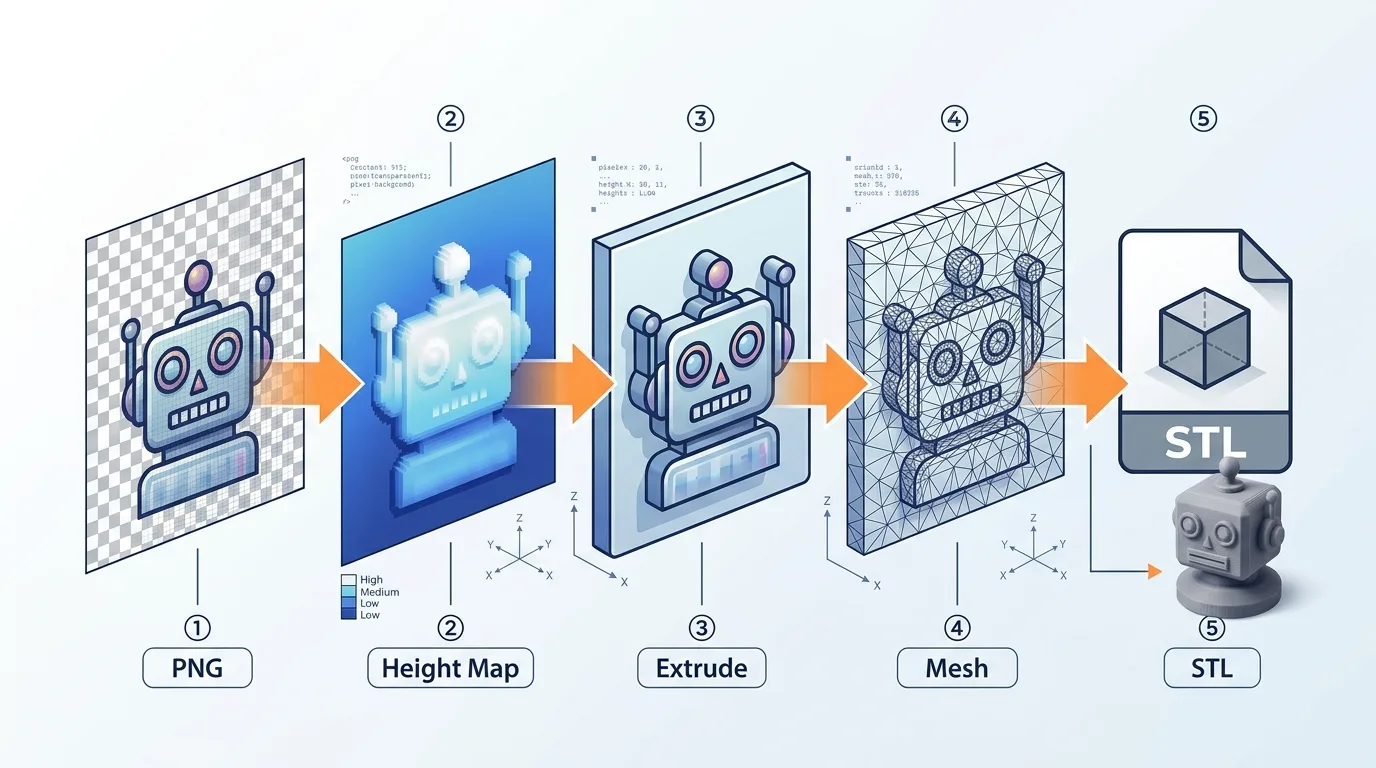
Converting PNG to STL essentially means turning a 2D bitmap image into a 3D mesh model that can be used for 3D printing, modeling, or engraving. A PNG image only contains 2D information such as pixel colors and transparency, while an STL file is made up of many triangular faces that describe the three-dimensional surface of an object.
There are two common conversion methods:
- Grayscale Heightmap Conversion
The brightness of the PNG image is converted into height data. In most cases, white areas become higher, black areas become lower, and gray areas fall somewhere in between. This method can generate 3D models with raised and recessed surfaces, such as reliefs, terrain models, texture plates, badges, and similar objects.
- Contour Extrusion Conversion
The outline is extracted based on the edges or transparent areas in the PNG, then the 2D contour is extruded upward to a certain thickness. This can generate STL files for keychains, logo plaques, text signs, icon models, and more.
In simple terms, if your PNG is a black-and-white logo, icon, or silhouette, contour extrusion is usually the better choice. If your PNG is a grayscale image, relief image, or heightmap, grayscale heightmap conversion is more suitable for generating a 3D model.
---
2. Differences Between PNG Images and STL 3D Models
PNG and STL are completely different file formats. Understanding the difference helps explain why a PNG cannot be directly converted into a complex 3D model without losing or inventing information.
PNG is a 2D image format with common characteristics such as:
- Made up of pixels;
- Supports transparent backgrounds;
- Supports color, grayscale, and black-and-white images;
- Mainly used for websites, design, icons, photos, and similar scenarios;
- Does not contain real depth, thickness, or volume information.
STL is a 3D model format with common characteristics such as:
- Made up of triangular faces;
- Describes the outer surface geometry of a model;
- Commonly used for 3D printing, CNC machining, and 3D modeling software;
- Does not store complex information such as color, material, or texture;
- Usually needs to be a closed or mostly printable solid structure.
Therefore, converting PNG to STL is not simply a matter of changing the file extension. It requires algorithms or modeling steps to add 3D information such as height, thickness, contours, and mesh geometry.
For example, a circular PNG image is only a flat circular graphic. When converting it into STL, you need to decide whether it should become a thin circular disk, a cylinder, a relief coin, or a badge with raised texture. Different conversion methods will produce completely different STL models.
---
3. PNG Types Suitable for 3D Model Conversion
Not every PNG image is suitable for conversion into STL. Photo-based PNGs can be converted into relief effects, but they often require more preparation. Images with clean edges and strong contrast usually produce cleaner 3D models.
PNG types that are more suitable for conversion include:
- Black-and-White Logos
Examples include brand marks, club emblems, simplified graphics, and similar designs. These images have clear outlines and are suitable for keychains, nameplates, stamps, or decorative pieces.
- Icons with Transparent Backgrounds
PNG files with transparent backgrounds are ideal for extracting outer contours. Transparent areas can be treated as empty space, while non-transparent areas can become solid parts.
- Black-and-White Silhouettes
Examples include animal silhouettes, side profiles, building outlines, and similar graphics. These are well suited for full extrusion.
- Grayscale Heightmaps
Grayscale images can be used to generate reliefs, terrain models, texture plates, and similar models. The closer the image is to a professional heightmap, the more natural the result will be.
- Text PNGs
If the text edges are clear, they can be turned into 3D letters, house numbers, signs, and other STL models. However, if the text is too thin, you need to consider its strength for later 3D printing.
PNG images that are not ideal for direct conversion include:
- Photos with complex backgrounds;
- Colorful images without clear brightness levels;
- Low-resolution images with blurry edges;
- Screenshots with lots of small noise;
- Complex designs with lines that are too thin or spacing that is too tight.
If the original image quality is poor, it is best to process the image before importing it into a conversion tool.
---
4. Key Image Preparation Tips Before Converting PNG
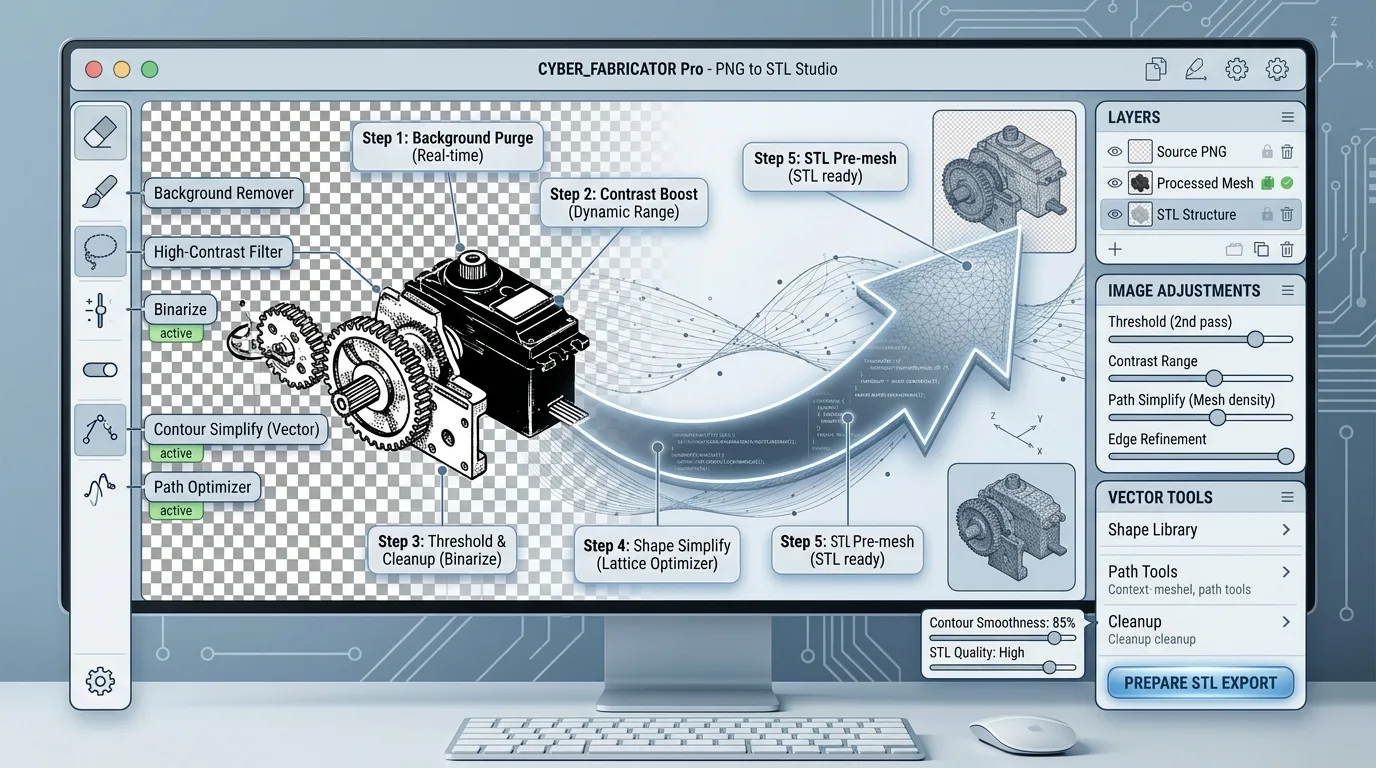
Before converting a PNG to STL, it is best to clean up and optimize the image first. The cleaner the image, the easier the resulting 3D model is to print, and the less likely it is to have broken surfaces, burrs, jagged edges, or similar issues.
Common preparation tips include:
- Increase Image Resolution
If the PNG is too small, the converted model may have obvious jagged edges. Try to use a higher-resolution image whenever possible, such as an icon or logo that is at least 1000 pixels wide or tall.
- Remove Unnecessary Backgrounds
For contour extrusion, it is best to use a PNG with a transparent background, or a pure white background with a black subject. Complex backgrounds can interfere with contour detection.
- Increase Black-and-White Contrast
If the grayscale levels are messy, adjust brightness, contrast, threshold, and similar settings to make the main subject clearer.
- Reduce Noise
Small specks, stray lines, and compression artifacts in the image may become bumps or holes in the model. You can clean them up using an eraser, noise reduction, blur followed by thresholding, and similar methods.
- Thicken Thin Lines
Lines that are too thin may be difficult to print after conversion to STL, or they may even disappear in slicing software. This is especially important for FDM 3D printing, where line width should ideally be at least twice the nozzle diameter.
- Simplify Complex Details
STL models are made of meshes. The more complex the image details, the higher the face count of the model. Too much detail can make the file large, slow down software, or even cause print failure.
If you use image editing tools such as Photoshop, GIMP, Photopea, or Canva, you can first turn the PNG into a high-contrast black-and-white version before converting it. For logo images, converting the PNG to an SVG vector file first and then extruding it into STL usually produces smoother results.
---
5. Generating a 3D Model from a Grayscale Heightmap
Grayscale heightmap conversion is one of the most common ways to convert PNG to STL. Its core logic is simple: pixel brightness determines model height.
In general:
- White areas represent the highest points;
- Black areas represent the lowest points;
- Gray areas represent intermediate heights;
- The smoother the grayscale transition, the smoother the model surface;
- The stronger the black-and-white contrast, the more dramatic the height variation.
This method is suitable for creating:
- Photo reliefs;
- Portrait reliefs;
- Terrain models;
- Texture plates;
- Coin reliefs;
- Decorative art panels;
- Commemorative plaques.
The basic workflow is as follows:
- Prepare a grayscale PNG image;
- Open a PNG-to-STL tool or modeling software;
- Choose a feature such as “Heightmap,” “Displacement,” or “Relief”;
- Set the model size, such as width, height, and thickness;
- Adjust the height strength, meaning how much the surface is raised;
- Generate the 3D mesh;
- Check whether the model is closed;
- Export it in STL format.
When adjusting parameters, pay special attention to the height ratio. If the height is too low, the model details will be unclear. If the height is too high, the surface may become too sharp and may not be suitable for printing.
Also, if you want to create a photo relief, it is best to convert the photo to black-and-white grayscale and increase the contrast appropriately. Portrait reliefs usually should not use the original photo directly, because backgrounds, shadows, and hair details can make the model surface look messy. A better approach is to crop the subject, soften or remove the background, and then generate the heightmap.
---
6. Generating an STL Model with Contour Extrusion
Contour extrusion is suitable for turning the boundaries of a PNG graphic into a solid object with thickness. Unlike grayscale heightmap conversion, it does not create complex surface height variations. Instead, it turns a 2D shape into a 3D model with a defined thickness.
For example, a black five-pointed star PNG can be converted into a thin star-shaped STL plate. A logo with a transparent background can be converted into a 3D logo model.
A common workflow is:
- Prepare a PNG with a transparent background or strong black-and-white contrast;
- Use a tool to detect the graphic outline;
- Convert the outline into paths or faces;
- Set the extrusion thickness;
- Add a base plate, bevels, or rounded edges;
- Check whether the model is closed;
- Export the STL file.
Contour extrusion is suitable for creating:
- Logo models;
- Keychains;
- Text signs;
- House number plates;
- Icon display pieces;
- Stamp bases;
- Decorative pendants;
- Simple silhouette models.
However, there are some things to watch out for. First, if the PNG edges contain semi-transparent pixels, the tool may detect many small fragmented contours, causing messy model edges. Second, if the design contains many small internal holes, such as complex patterns or tiny text, the converted model may have floating parts, breaks, or areas that are difficult to print.
For better results, convert the PNG into a pure black-and-white image before processing. Use black as the solid area, and white or transparent areas as empty space. This produces cleaner model edges and makes later repair easier.
---
7. Common Online Tools for Converting PNG to STL
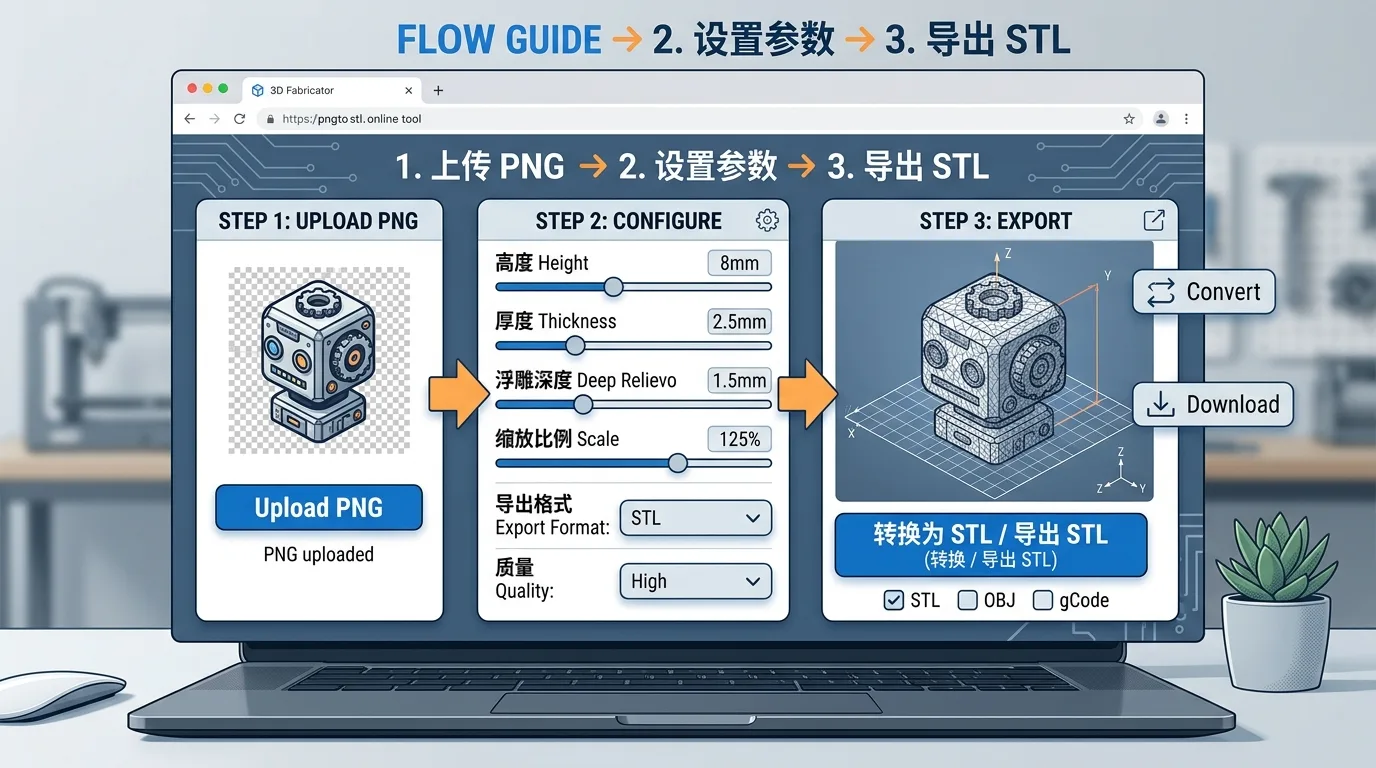
If you do not want to install 3D modeling software, you can try an online PNG-to-STL tool first. Online tools are suitable for quickly generating simple models, especially for beginners testing the results.
Common types of online tools include:
- Image-to-Relief Tools
These tools usually support uploading PNG, JPG, and similar image formats, then generating relief STL files through grayscale heightmap conversion. They are suitable for photo reliefs, badges, and texture plates.
- Logo-to-3D Tools
These tools can recognize black-and-white designs or images with transparent backgrounds, then extrude the design to a certain thickness. They are suitable for logo plaques and keychains.
- Lithophane Tools
Lithophanes are often used to create backlit photo reliefs. The brightness of the image is converted into different thicknesses, and when used with backlighting, the photo effect becomes visible.
- SVG/STL Conversion Tools
Some tools do not process PNG directly, but you can first convert the PNG to SVG, then extrude the SVG into STL. This approach is especially useful for logos and text.
When using online tools, pay attention to these settings:
- Model width and height: determines the final physical size;
- Base thickness: determines the thickness of the backing plate;
- Maximum height: determines the highest point of the relief;
- Invert height: switches the height relationship between black and white;
- Smoothing level: reduces noise and jagged edges;
- Mesh resolution: affects detail and file size;
- Export format: confirms whether STL is supported.
Online tools are convenient, but they may not be suitable for complex models. You should also consider privacy and copyright when uploading images. If the image is a commercial logo, client file, or unpublished design, it is better to process it with local software.
---
8. Using Blender to Convert PNG to STL
Blender is a powerful free 3D software package that can also be used to convert PNG to STL. Compared with online tools, Blender offers more flexible control and is better for further editing, repairing, and optimizing models.
One common method is to use displacement to create a relief model:
- Open Blender and create a new scene;
- Delete the default cube;
- Add a plane;
- Subdivide the plane so it has enough mesh geometry;
- Add a material or texture and load the PNG image;
- Use a Displace modifier or related nodes to convert grayscale data into height;
- Adjust the displacement strength;
- Add solid thickness to the model;
- Apply the modifiers;
- Check normal direction and whether the model is closed;
- Export the file as STL.
For logo or icon PNGs, you can use another approach:
- Convert the PNG to an SVG vector path first;
- Import the SVG into Blender;
- Convert the curve to a mesh;
- Set the extrusion thickness;
- Add bevels or rounded edges;
- Merge and clean up unnecessary points and lines;
- Export as STL.
To export an STL file in Blender, follow these steps:
- Select the model you want to export;
- Click “File”;
- Choose “Export”;
- Select “STL”;
- Enable export selected objects only;
- Set the unit and scale;
- Save the file.
After exporting, it is recommended to check the model again with slicing software or a model repair tool. Look for issues such as broken surfaces, flipped normals, non-manifold edges, and areas that are too thin. For 3D printing, also confirm that the model dimensions, wall thickness, and bottom contact area are reasonable.
Overall, PNG to STL conversion can be done quickly with online tools, or more precisely with Blender. For simple logos, contour extrusion is recommended. For reliefs, terrain, and photo-style effects, grayscale heightmap conversion is the better choice. As long as the image is properly prepared beforehand, the final STL model can usually achieve good 3D printing results.