
Blog
How to Use a 3D Printer: A Beginner’s Guide
Learn how to use a 3D printer with this beginner’s guide covering printer types, materials, model files, slicing, setup, and essential printing tips.
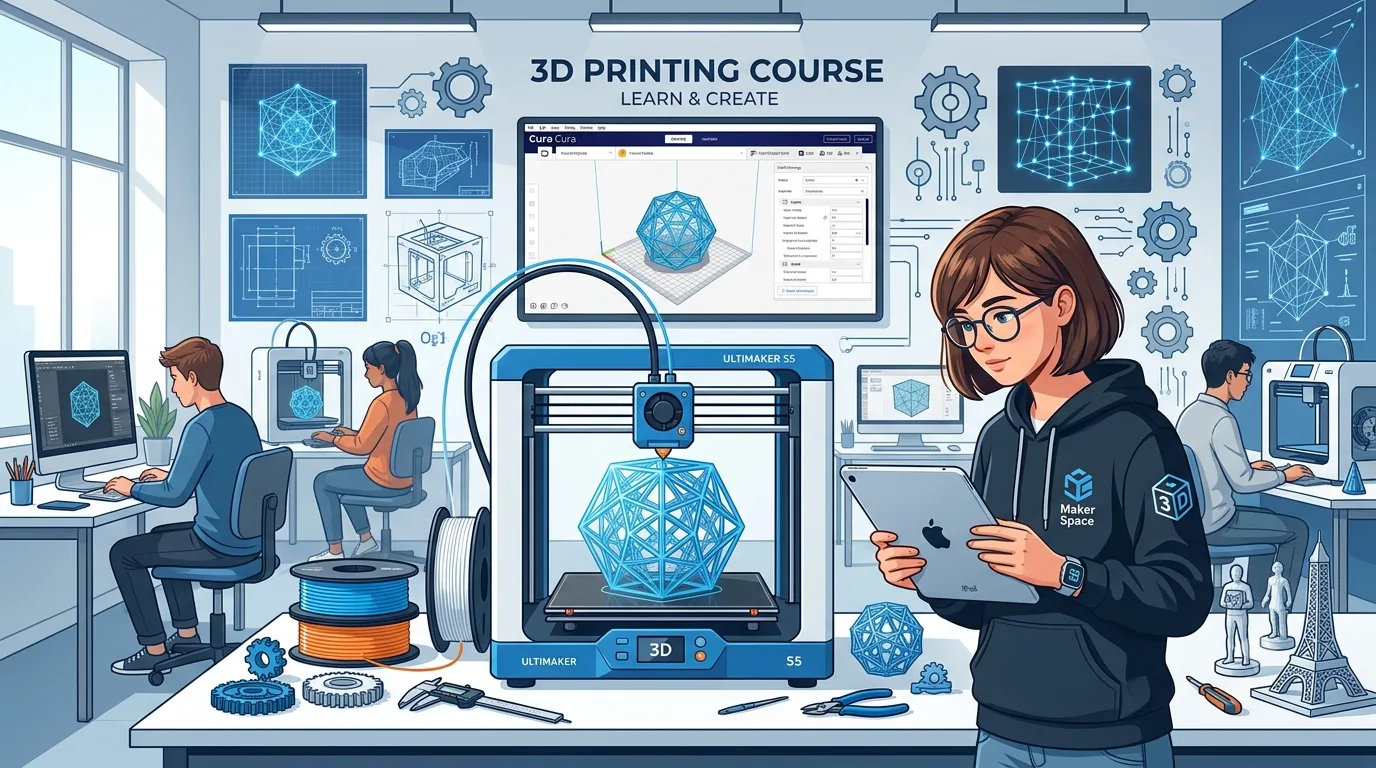
3D Printing Beginner’s Guide
3D printing is a manufacturing technology that turns digital models into physical objects. Whether you want to make figurines, parts, educational models, or product prototypes, 3D printing makes small-batch and customized production possible at a relatively low cost.
This guide covers the essential concepts, use cases, printer types, common materials, equipment preparation, model sourcing, 3D modeling software options, and file formats to help beginners build a complete understanding of 3D printing.
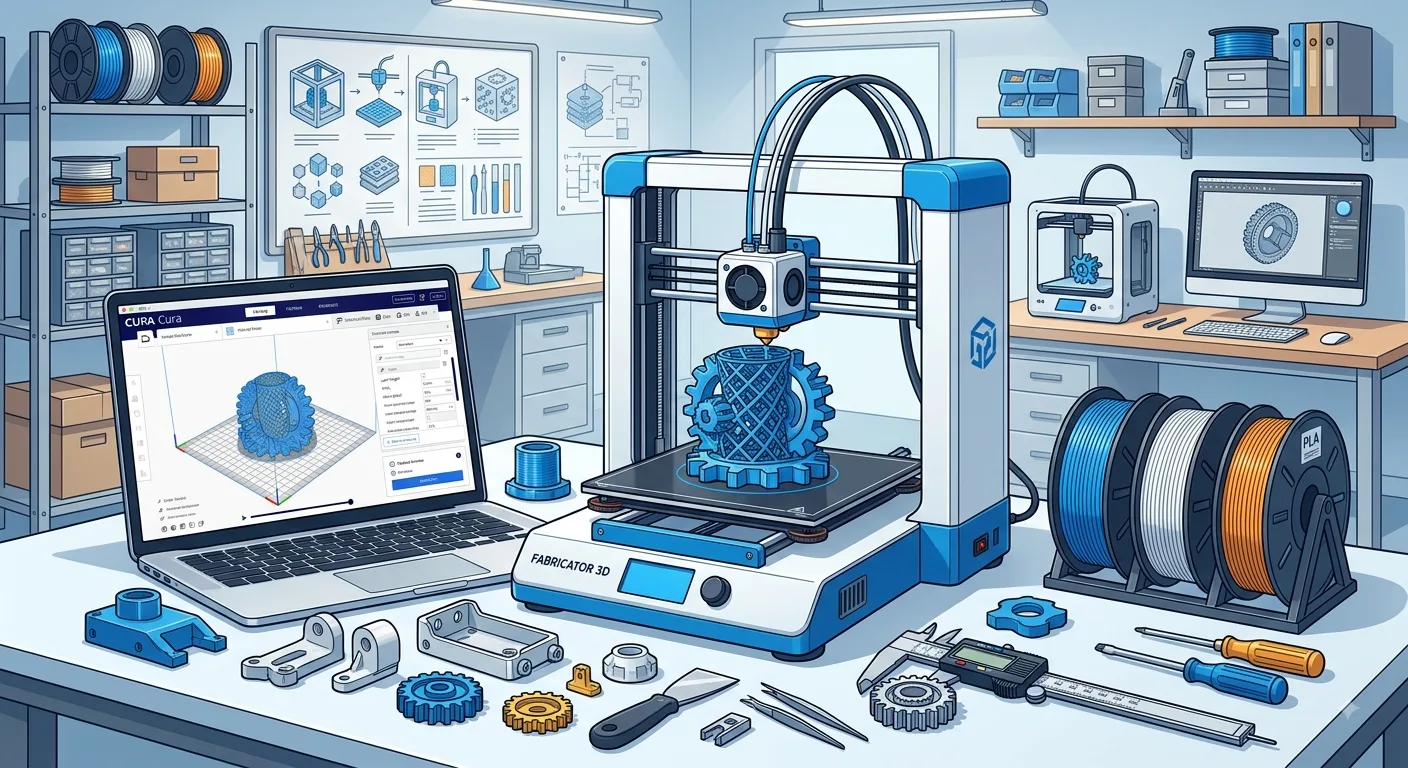
Overview of 3D Printing Technology
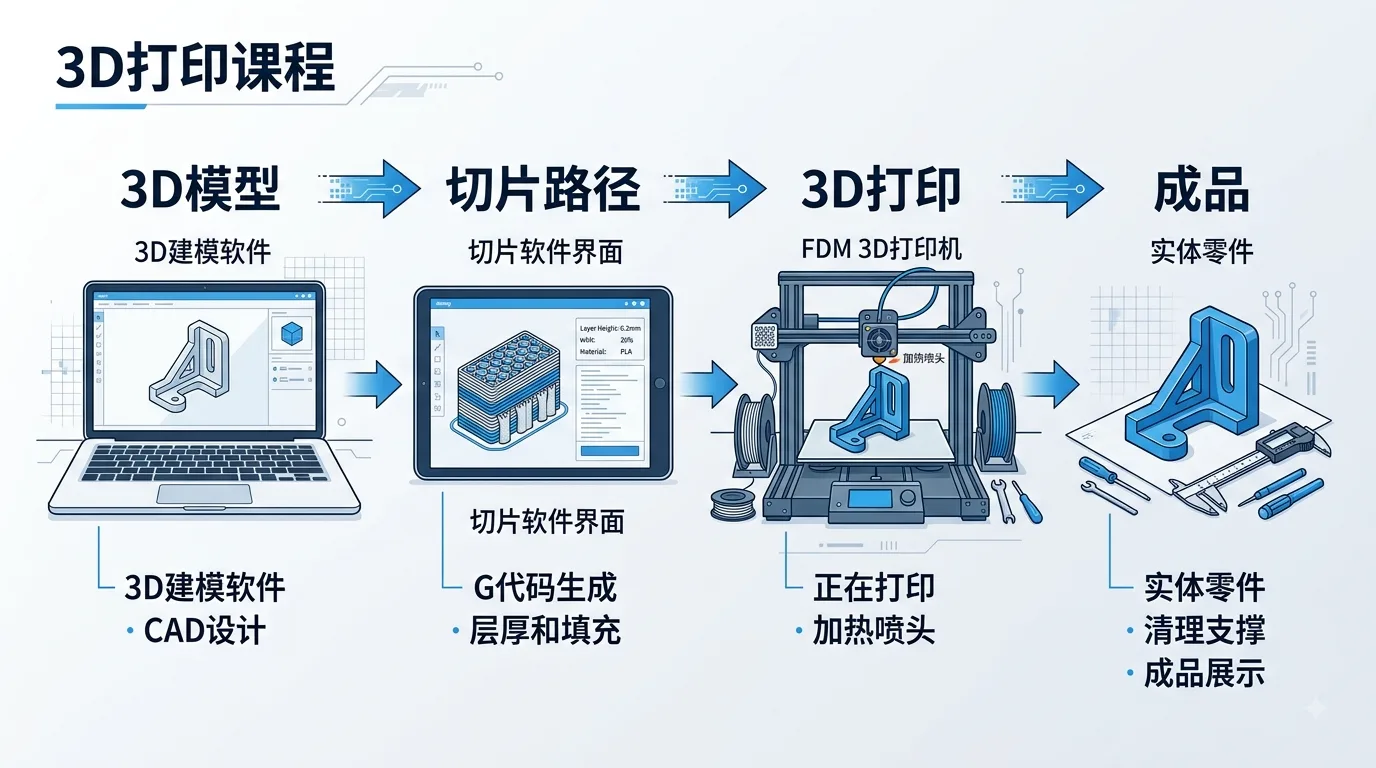
3D printing, also known as additive manufacturing, creates physical objects by stacking material layer by layer. Unlike traditional subtractive manufacturing methods such as cutting, carving, and milling, 3D printing typically builds an object from scratch by adding material one layer at a time until the full model is complete.
In general, the basic 3D printing workflow includes:
- Obtaining or designing a 3D model
- Importing the model into slicing software
- Setting print parameters
- Generating an instruction file the printer can read
- Printing the model layer by layer
- Post-processing and finishing the final part
Among these steps, slicing is especially important. Slicing software breaks a 3D model into many thin layers and plans the movement paths for the nozzle or light source. The printer then follows these paths to build the object layer by layer until the model is finished.
The main advantages of 3D printing include:
- Well suited for customization
- Ideal for producing complex structures
- Lower cost for small-batch production
- Shorter cycle from design to physical object
- Convenient for rapid product prototyping
However, 3D printing also has limitations, such as relatively slow print speeds, surface quality that depends heavily on the machine, limited material performance, and higher costs for large-format prints. In real-world use, you need to choose the right printer, material, and settings based on your intended application.
Common 3D Printing Applications
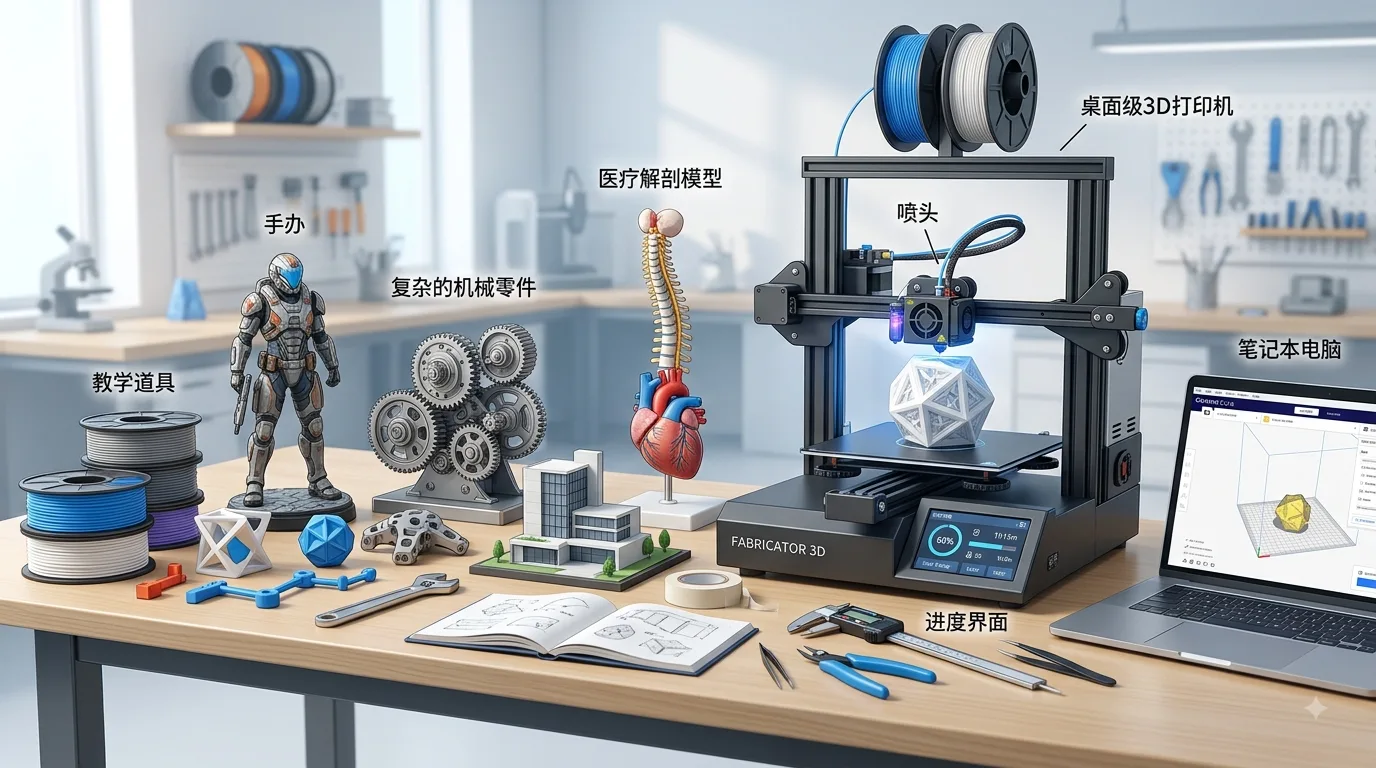
3D printing is used across a wide range of fields, from personal hobbies to industrial production. For everyday users and beginners, the following applications are the most common.
1. Figurines and Decorative Items
Many users make anime figures, game characters, ornaments, keychains, lampshades, and personalized decorations with 3D printing. Compared with buying finished products, 3D printing lets you adjust the size, shape, and color to match your preferences.
If you use a resin printer, you can achieve a finer surface finish, making it suitable for high-detail models.
2. Product Prototype Validation
For designers, engineers, and startup teams, 3D printing is highly suitable for making product prototypes. Parts such as enclosures, structural components, buttons, and brackets can be printed first to check dimensions, feel, and assembly before moving into mass production.
This approach can greatly reduce trial-and-error costs and shorten the product development cycle.
3. Mechanical Parts and Repair Components
Simple brackets, clips, mounts, gears, connectors, and similar parts can be made quickly with 3D printing. For discontinued equipment or small replacement parts that are hard to buy, 3D printing also provides a practical alternative.
However, if a part needs to withstand high temperatures, high pressure, or long-term stress, you should choose a stronger material and thoroughly test its reliability.
4. Education and Science Communication
In education, 3D printing can be used to create geometry models, terrain models, molecular structures, human organ models, mechanical demonstrations, and more. Compared with images and videos, physical models are more intuitive and help students understand abstract concepts more easily.
5. Architecture and Spatial Design
Architects and designers often use 3D printing to make architectural scale models, interior space models, and landscape planning models. Printed models help clients understand design proposals more visually.
6. Medical Support Models
In healthcare, 3D printing can be used to make bone models, dental models, surgical planning models, and personalized assistive devices. Medical-grade applications have high requirements for materials, safety, and accuracy, so they usually require professional equipment and standardized workflows.
Main Types of 3D Printers
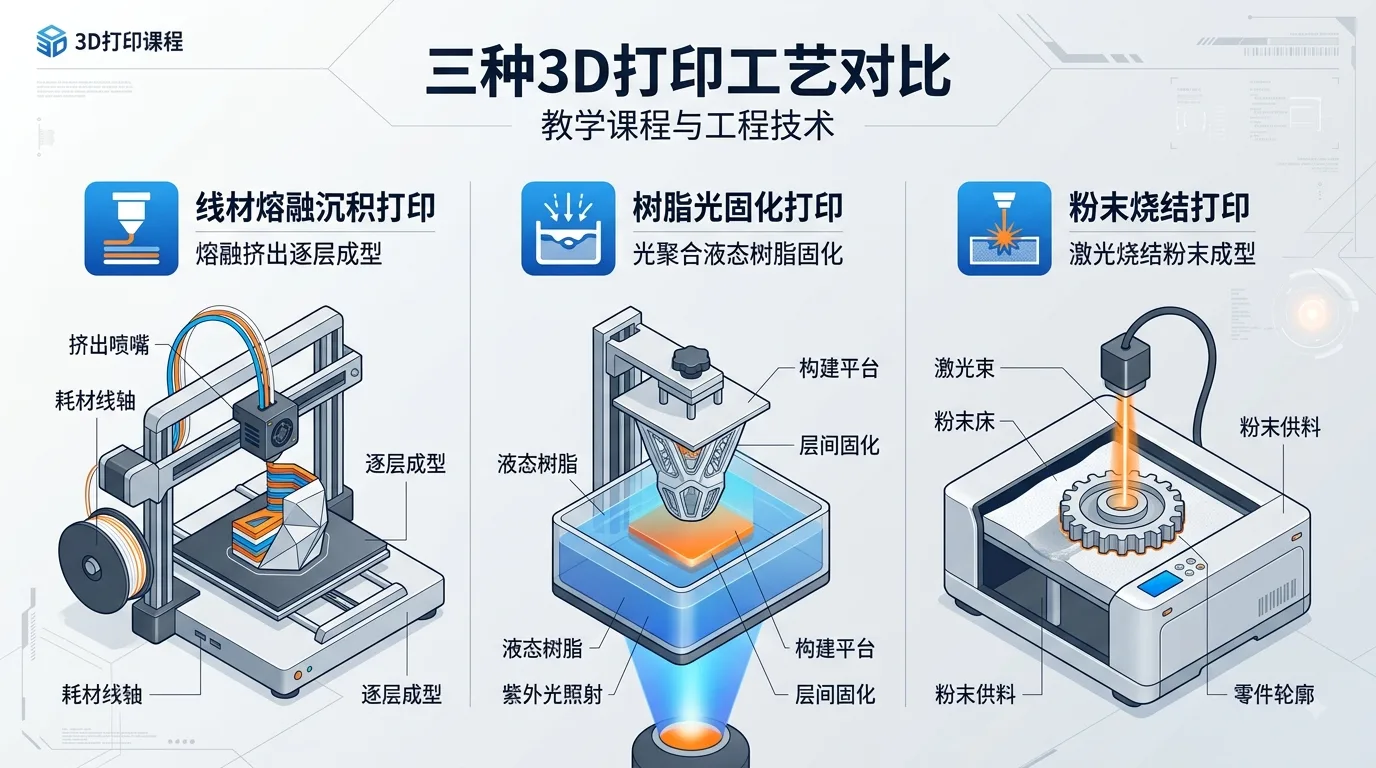
There are many types of 3D printers on the market. Beginners most commonly encounter fused deposition printers and resin photopolymerization printers. Different printer types vary significantly in working principle, cost, accuracy, and suitable use cases.
1. Fused Deposition Modeling Printers
Fused Deposition Modeling, or FDM, is the most common desktop 3D printing technology. It works by heating and melting filament, then extruding it through a nozzle and stacking it layer by layer along a programmed path.
These printers are known for:
- Relatively affordable hardware
- A wide range of filament options
- Simple maintenance
- Suitability for most beginner-level models
- Good strength in finished parts
Common applications include tool accessories, structural parts, toys, brackets, enclosures, and educational models.
However, FDM prints usually have visible layer lines, and fine detail is not as strong as with resin printers. If you need a smoother appearance, post-processing such as sanding, filling, and painting may be required.
2. Resin Photopolymerization Printers
Resin printers use liquid resin as the material and cure it layer by layer with ultraviolet light. Common desktop resin printers offer high accuracy and are well suited for small models with rich details.
Their features include:
- High print accuracy
- Smooth surface finish
- Suitability for figurines, jewelry prototypes, dental models, and similar items
- Excellent results for small, detailed models
They also have some drawbacks:
- Resin has an odor, so ventilation is needed during use
- Printed parts require washing and secondary curing
- Gloves should be worn to avoid direct skin contact with resin
- Finished parts are often brittle and not ideal for load-bearing structural components
If your main goal is to print figurines, miniatures, or high-detail appearance parts, a resin printer is a good option.
3. Selective Laser Sintering Systems
Selective Laser Sintering, or SLS, is mostly used in industrial settings. Common materials include nylon powder and metal powder. It forms solid objects by sintering powdered material with a laser, making it suitable for complex structures and functional parts.
These machines are usually expensive and complex to maintain, so they are not suitable for typical home users. However, they are widely used in industrial manufacturing, aerospace, automotive, and medical applications.
4. Other Printer Types
Beyond these categories, there are specialized technologies such as ceramic 3D printing, metal 3D printing, concrete 3D printing, and bioprinting. These systems are generally aimed at professional industries, so beginners only need a basic awareness of them at first.
Common 3D Printing Materials
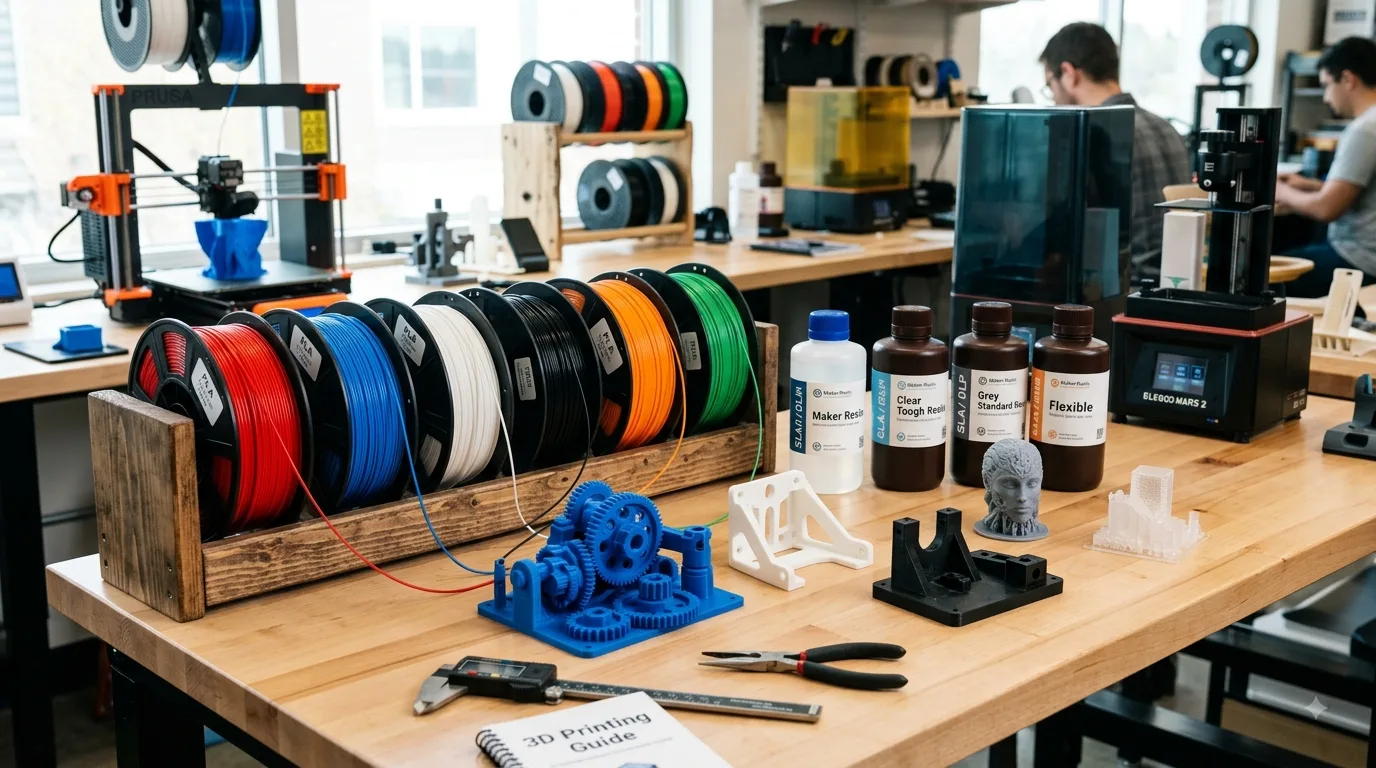
Materials directly affect print quality, strength, heat resistance, and post-processing methods. When choosing a material, consider both your printer type and the intended use of the model.
1. PLA Filament
PLA is one of the best FDM printing materials for beginners. It is made from renewable plant-based raw materials, produces little odor during printing, has minimal warping, and offers a high success rate.
Advantages:
- Easy to print
- Available in many colors
- Moderately priced
- Suitable for decorative parts, models, toys, and teaching aids
Disadvantages:
- Average heat resistance
- Relatively low toughness
- Not suitable for long-term sun exposure or high-temperature environments
If you are just starting to learn 3D printing, PLA is the recommended first choice.
2. PETG Filament
PETG offers a balance of strength and toughness, with better heat resistance than PLA. It is suitable for parts that need a certain level of durability, such as brackets, enclosures, and tool holders.
Advantages:
- Good toughness
- Strong impact resistance
- Better heat resistance than PLA
- Suitable for functional parts
Disadvantages:
- Prone to stringing during printing
- Requires slightly more parameter tuning
- Has certain requirements for cooling and temperature control
3. ABS Filament
ABS is a strong material with good heat resistance and is often used for engineering parts. However, it warps easily during printing and produces a noticeable odor, so it usually requires an enclosed printer and good ventilation.
Advantages:
- Good strength
- High heat resistance
- Can be post-processed through sanding, vapor smoothing, and similar methods
Disadvantages:
- Prone to warping and cracking
- Produces a strong printing odor
- Requires a more controlled printing environment
Beginners are not advised to start with ABS.
4. TPU Flexible Filament
TPU is a flexible material suitable for printing phone cases, soft pads, sealing rings, anti-slip feet, and other elastic items.
Advantages:
- Soft and elastic
- Good wear resistance
- Suitable for special functional parts
Disadvantages:
- Slower print speed
- Higher requirements for the extrusion system
- Improper settings may cause clogs or unstable extrusion
5. Photopolymer Resin
Resin is used in photopolymerization printers. Common types include standard resin, water-washable resin, tough resin, high-temperature resin, and casting resin.
Standard resin is suitable for models and display pieces; tough resin works better for parts that need some impact resistance; water-washable resin is easier to clean, but safety protection is still required.
When using resin materials, remember to:
- Wear gloves and a mask
- Keep the area well ventilated
- Avoid resin contact with skin and eyes
- Wash and post-cure prints after printing
- Do not pour waste liquid directly down the drain
Preparing Your Equipment Before 3D Printing
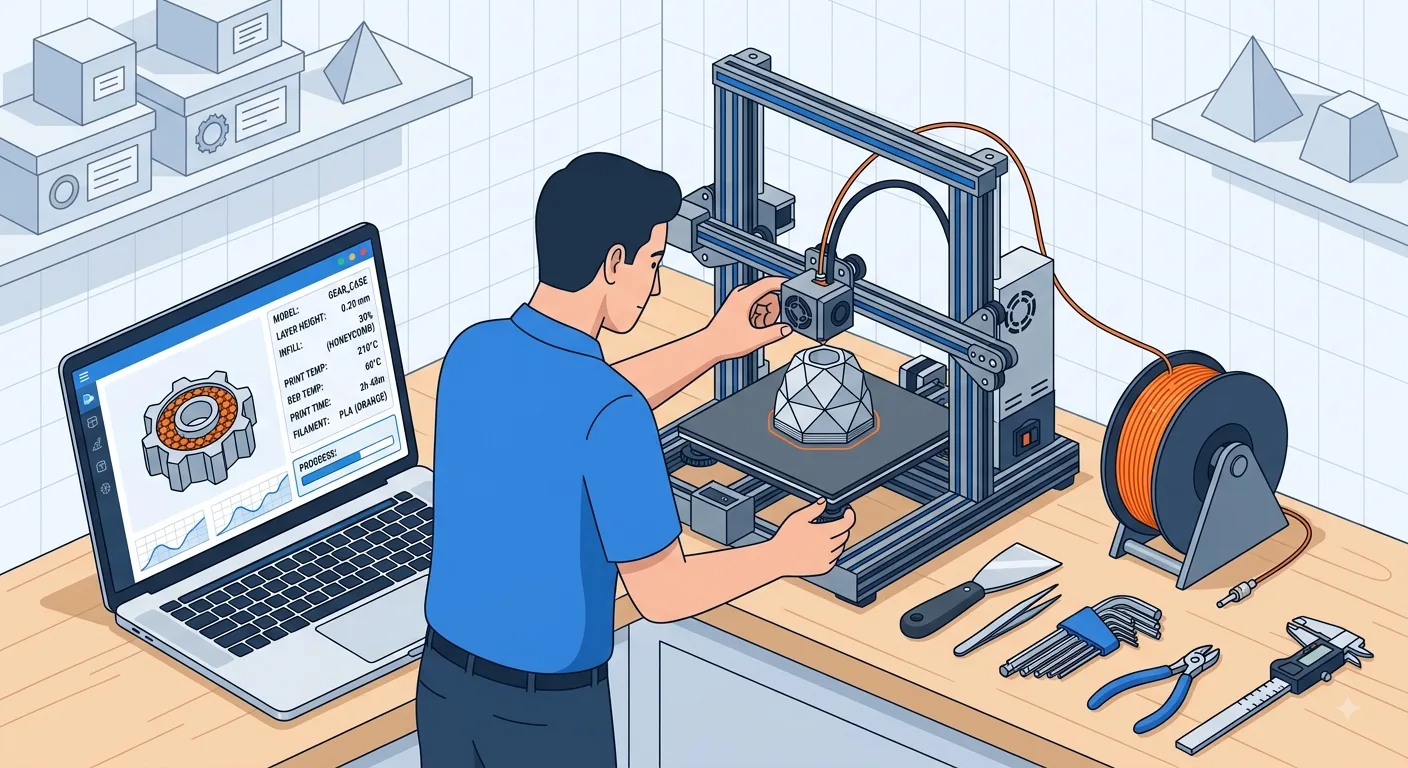
Proper preparation before printing can significantly improve your success rate. Many print failures are not caused by the model itself, but by bed leveling issues, material condition, temperature settings, or improperly prepared files.
1. Check the Printer Structure
Before turning on the printer, check whether it is placed on a stable surface, whether the frame is loose, and whether there is visible debris on the rails or lead screws. For a new machine, also confirm that screws, belts, limit switches, and cable connectors are securely installed.
If the printer makes unusual noises, stutters, or moves poorly along an axis, troubleshoot the mechanical issue before starting a print.
2. Clean the Print Bed
Dust, oil, or leftover material on the print bed can affect first-layer adhesion. You can clean the surface with a lint-free cloth, alcohol, or a dedicated cleaning solution.
After cleaning the bed, avoid touching the print area directly with your hands, as skin oils can also cause warping or part detachment.
3. Level the Bed
Bed leveling is a very important step in FDM printing. If the nozzle is too far from the bed, the first layer will not stick properly. If it is too close, the nozzle may scrape the bed or cause poor extrusion.
Common leveling methods include:
- Manual knob leveling
- Automatic leveling sensors
- Mesh bed leveling compensation
Beginners can use a sheet of regular paper to assist with leveling, aiming for slight friction between the nozzle and the bed. After leveling, you can print a first-layer test model to check whether the lines are even.
4. Check the Nozzle and Filament
A clogged nozzle can cause under-extrusion, material breaks, rough surfaces, and other issues. Before printing, manually extrude a short length of filament and check whether the flow is smooth.
Filament should also be kept dry. Moist filament may cause bubbles, popping sounds, increased stringing, and rough surfaces during printing. Filament that will not be used for a long time should be stored in a sealed bag with desiccant.
5. Prepare Common Tools
It is recommended to prepare the following basic tools:
- Scraper or removal spatula
- Flush cutters
- Tweezers
- Hex keys
- Alcohol and cleaning cloths
- Gloves
- Sandpaper
- Glue stick or other bed-adhesion aid
If you use a resin printer, you will also need a wash container, curing light, filter funnel, protective gloves, mask, and waste liquid container.
6. Set Up the Printing Environment
The printer should be placed in a stable, well-ventilated location away from children and pets. FDM printers should not be placed in drafty areas, as temperature fluctuations can cause warping. Resin printers should also be kept out of direct sunlight, since UV light may cure the resin prematurely.
Ways to Get 3D Model Files
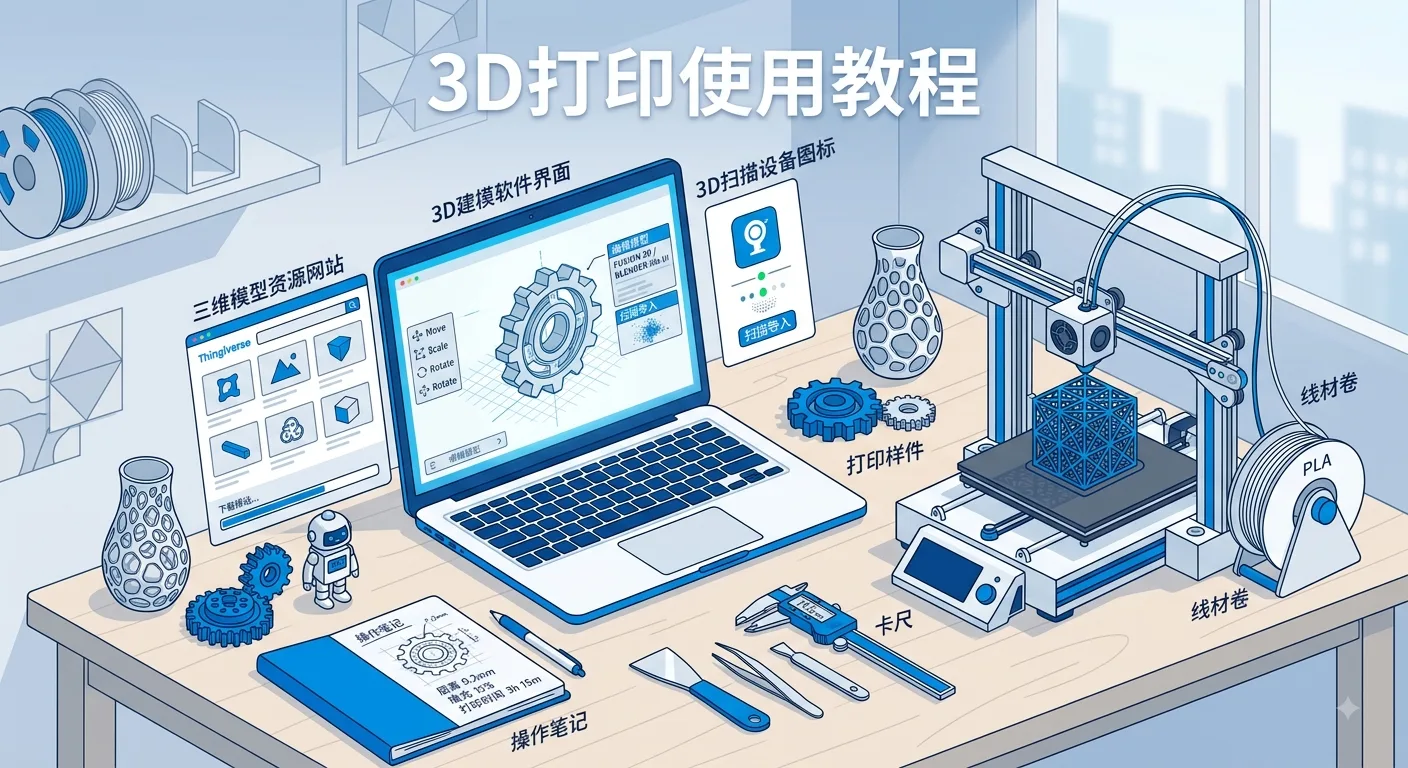
3D printing requires a 3D model file first. You can design the model yourself, download one from the internet, or obtain one through 3D scanning.
1. Download from Model Websites
For beginners, downloading ready-made files from model platforms is the fastest way to get started. Many websites offer free or paid models, including toys, tools, storage boxes, decorations, mechanical accessories, and more.
When downloading a model, pay attention to:
- Whether the model is designed for 3D printing
- Comments and photos of finished prints
- Whether the model dimensions are suitable
- Whether supports are required
- The license terms to avoid commercial infringement
Some models may look impressive but are intended only for rendering and display, not direct printing. After downloading, it is best to check in slicing software whether the model is watertight and whether it has broken surfaces or unsupported overhangs.
2. Design Your Own Model
If you need an object with unique dimensions, special structures, or a personalized appearance, you can design it yourself using 3D modeling software. For functional parts, modeling it yourself is often more accurate because you can adjust the model based on real measurements.
Self-modeling is suitable for:
- Custom storage racks
- Replacement repair parts
- Product enclosures
- Tool fixtures
- Personalized gifts
- Creative decorations
Beginners can start with simple geometric objects, such as boxes, brackets, hooks, and nameplates. There is no need to begin with complex curved-surface models.
3. Use 3D Scanning
3D scanning can turn real-world objects into digital models. Common methods include phone scanning, structured light scanning, laser scanning, and photogrammetry.
3D scanning is useful for copying complex shapes such as sculptures, body parts, cultural artifact models, and artworks. However, scanned models usually need to be repaired and simplified before they can be printed.
When scanning someone else’s objects or commercial products, make sure to respect copyrights and usage restrictions.
4. Commission a Design or Buy a Model
If you cannot model the object yourself and cannot find a suitable file, you can hire a designer to create one or purchase a professional model file. For commercial projects, product development, and high-precision structural parts, this approach is more reliable.
When commissioning a model, try to provide:
- Dimension drawings or sketches
- Reference images
- Use case
- Material requirements
- Accuracy requirements
- Whether assembly features are needed
The clearer the information, the more closely the final model will match your needs.
Choosing Basic 3D Modeling Software
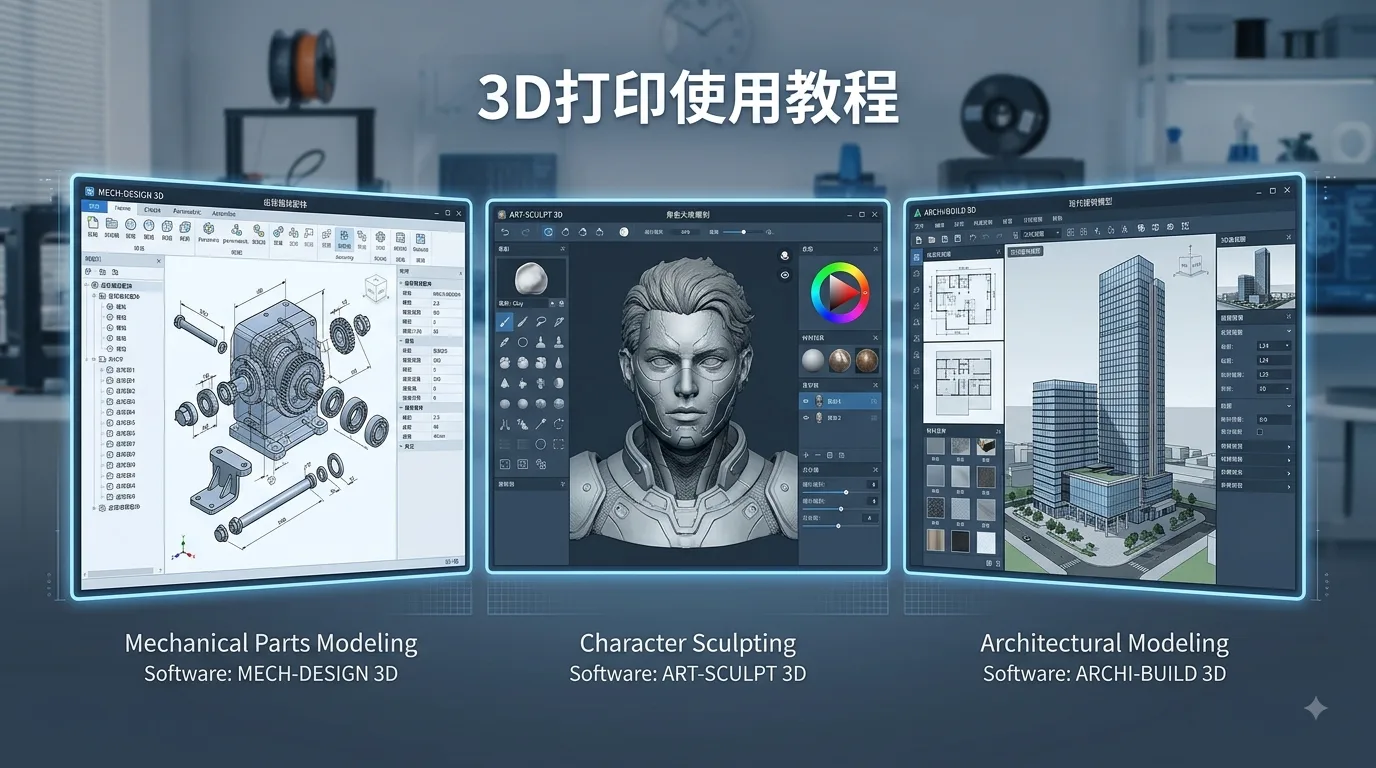
Different 3D modeling programs are suited to different types of models. When choosing software, you do not need the most complex tool; instead, choose based on your goals and the learning curve.
1. Beginner-Friendly Modeling Software
Beginner-friendly software is usually simple to use and suitable for children, students, and users with no prior experience. These tools often create models by dragging, combining, and cutting basic geometric shapes.
Suitable for making:
- Simple display pieces
- Nameplates
- Small boxes
- Geometric structures
- Educational models
The advantage of this type of software is its low learning cost and quick onboarding. The drawback is limited ability to create complex surfaces and precision structures.
2. Parametric Modeling Software
Parametric modeling software is suitable for designing mechanical parts, product enclosures, structural components, and models that require accurate dimensions. Users can build models through sketches, extrusion, rotation, chamfering, Boolean operations, and other methods, while controlling dimensions with parameters.
Suitable for making:
- Gears
- Connectors
- Enclosures
- Brackets
- Fixtures
- Engineering parts
If your goal is to print practical parts, learning parametric modeling is recommended. Although it is slightly more difficult than beginner tools, it is better suited to serious design work.
3. Sculpting Software
Sculpting software is suitable for creating characters, monsters, figurines, reliefs, and organic surface models. Its workflow is similar to digital sculpting, allowing you to push, pull, carve, smooth, and refine the model surface.
Suitable for making:
- Character models
- Animal models
- Figurine prototypes
- Monster models
- Art sculptures
This type of software requires some artistic foundation, but it can produce highly detailed models.
4. Architecture and Scene Modeling Software
Architectural modeling software is suitable for creating houses, interiors, architectural scale models, and scene models. These tools are usually more convenient for spatial planning and scale control.
Suitable for making:
- Architectural models
- Interior layouts
- Landscape features
- Presentation scale models
- Scene props
If you work in architecture, interior design, or exhibition design, these tools are a good place to start.
5. How Beginners Should Choose
If you just want to try 3D printing, you can start with ready-made models and do not need to learn complex modeling right away. After becoming familiar with the printing workflow, choose software based on your goals:
- For simple objects: choose beginner-friendly modeling tools
- For mechanical parts: choose parametric modeling software
- For figurines and characters: choose sculpting software
- For architectural models: choose architectural modeling software
When learning 3D modeling, start by understanding a few basic concepts: dimensions, scale, wall thickness, chamfers, supports, assembly clearance, and watertight geometry. These concepts directly affect print success rates.
Model File Formats Explained
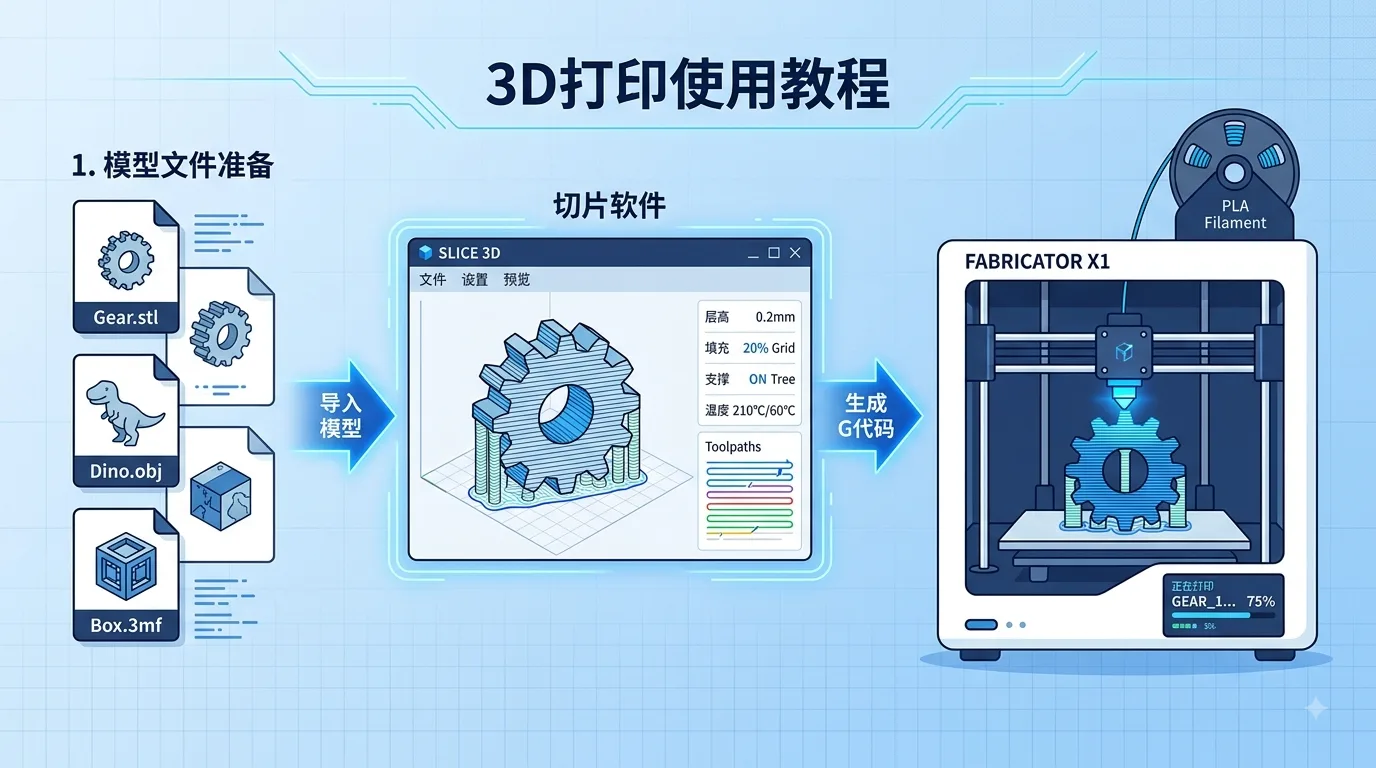
You will encounter several file formats during the 3D printing process. Understanding what each one does can help you avoid import failures, incorrect sizing, and print issues.
1. STL Format
STL is one of the most common 3D printing model formats. It describes the surface of a model using triangular mesh faces and is supported by almost all slicing software.
Advantages:
- Strong compatibility
- Simple file structure
- Suitable for most printing workflows
Disadvantages:
- Does not store color information
- Does not store material information
- Curved surfaces are approximated with triangles, so accuracy depends on export settings
When exporting STL files, if the resolution is too low, curved surfaces may appear rough. If the resolution is too high, the file may become unnecessarily large. In general, choose an appropriate resolution based on the complexity of the model.
2. OBJ Format
OBJ is also commonly used for 3D model exchange. It can store model geometry and supports texture and material files, so it is often used for character models, art models, and scanned models.
Advantages:
- Supports more surface information
- Commonly used for sculpted and scanned models
- Suitable for complex appearance-focused models
Disadvantages:
- May include multiple associated files
- Material information is not needed in every printing workflow
- Scale and model integrity may need to be checked after importing into slicing software
If you are printing in a single color, the material and texture information in an OBJ file usually will not appear directly on the finished print.
3. 3MF Format
3MF is a newer 3D printing file format that can store richer information than STL, such as units, colors, materials, model positions, and print settings.
Advantages:
- Stores more complete information
- Less prone to unit mismatch issues
- Suitable for multi-material and multi-color printing
- Can save project-level data
More and more slicing programs now support 3MF. For complex projects, 3MF is often more convenient than STL.
4. STEP Format
STEP is commonly used for data exchange between engineering design and parametric modeling software. It stores data closer to solid modeling rather than a simple triangular mesh.
Advantages:
- Suitable for mechanical parts
- Easier to edit later
- More accurate dimensions and surface information
Disadvantages:
- Not all slicing software handles it perfectly
- Usually needs to be converted to STL or 3MF before slicing
If you download an engineering part, the STEP format is very useful for later adjusting dimensions or modifying the structure.
5. G-code Files
G-code is the printer instruction file generated by slicing software. It is not a model file; instead, it tells the printer how to move, extrude, heat, and print.
The usual workflow is:
- Import STL, OBJ, or 3MF into slicing software
- Set parameters such as layer height, infill, supports, and temperature
- Slice the model to generate G-code
- Send the G-code to the printer for execution
Note that G-code is usually tied to a specific printer model, nozzle size, bed size, and material profile. Do not use G-code files from unknown sources casually, as they may cause print failure or even damage the machine.
6. File Format Recommendations
For beginners, the following choices are a good starting point:
- Downloading standard models: use STL or 3MF first
- Printing complex full-color models: use 3MF first
- Editing engineering parts: look for STEP files first
- Using scanned models: OBJ or STL is common
- Actual print files: G-code is ultimately generated by slicing software
Before starting a print, always preview the model in slicing software to check its size, orientation, supports, first-layer contact area, and estimated print time. This helps you spot problems early and reduce wasted material.